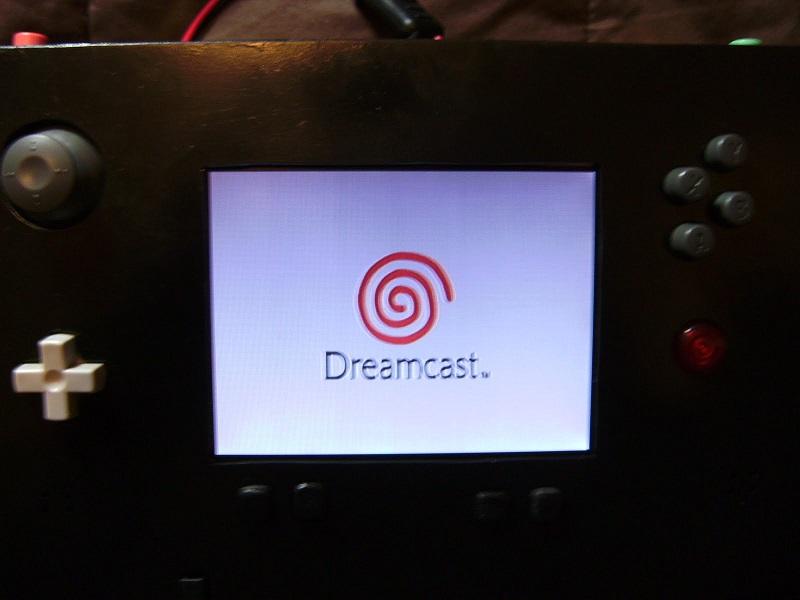
Dreamcast Portable
What's better than taking your Dreamcast on the go?
2017-06-08
In high school, I found a website that really piqued my interest, benheck.com. Ben Heck is a hardware hacker who has done many projects involving video game consoles. I had been interested in modding my Xbox and had previously thought about how cool it would be to take apart a game console mount all the parts on a wall. So when I found Ben Heck I was hooked immediately. I never had the money or the time to tackle my own project until 2008, when I was getting ready to graduate from high school and finally had some time. I loved the Sega Dreamcast and decided that I was going to make a Dreamcast portable. Part of the draw was the fact that there were only 1 or 2 other people on the benheck.com forums that had been successful in creating a portable out of the Sega Dreamcast.
The first thing was to take apart the Dreamcast.


It wasn't until after I got the Dreamcast from eBay that I found out that I had actually received one of the later versions of the Dreamcast which did not have a separate board for controlling the GD-ROM drive which meant that smashing this thing into a case was going to be a lot easier.
The next steps were to get the Dreamcast running off of a smaller power supply that could be run off a battery. For this, I chose the PICO PSU. It's an ATX power supply intended for embedded systems using PICO or MICRO ITX boards. It provided all of the necessary power needs as the Dreamcast runs off of 12v, 5v, and 3.3v just as a PC does. The other advantage of the PICO PSU was that it could be run off of any 12V power source. Which means a battery can power it. Whereas the original power supply required 120V AC wall power which doesn't work well in a portable.

For the screen of the portable, I used a 5" TFT LCD screen intended for hooking onto the top of an original Xbox in case you somehow could travel with it. Oddly enough I have used it in a car before. The screen already has built-in audio and headphone jacks which made it ideal for a portable.

Sorry for the blurry photo. I don't have any other pictures of this.
The next step was the construction of the case. I didn't have access to very many tools that could make an intricate case. So I settled on building the case out of a sheet of acrylic that I could cut up on a band saw and glue together.


To mount all of the pieces I cut little pieces of acrylic and stacked them up, glued them to the case, and drilled screw holes in them.
Unfortunately, I don't have a ton of pictures of shoving all of the pieces into the case. But to give you an idea of how crowded it got in there.

But the finished product turned out pretty good, for a big black box.


I also made a super awesome demo video of me playing Slave Zero.